Showing posts with label Tutorials. Show all posts

Thursday, November 5, 2020

Keep Your Makeup Tools Clean


Let’s be honest: Cleaning our make-up tools can get tedious. But now more than ever, it’s important to sterilize our brushes and sponges and throw out expired beauty products to prevent further spread of germs, bacteria and/or virus. Ever Bilena, the country’s leading cosmetics brand, shares some tips on cleaning make-up tools: 

Clean your make-up brushes regularly. Because make-up brushes are used on our faces, the cleaner it is the better. Make-up professionals suggest to clean sponges at least once a week and brushes at least twice a month to prevent product build-up. Cleaning make-up tools doesn’t only keep skin clean but also extend their life and make better product application. 

You can use cleaning products at home. Dip brushes in a solution of gentle soap of shampoo and lukewarm water and then one by one, rub bristles gently with fingers to get a good lather. Swirl the brush on your palm to remove product build-up then rinse off the soap with clean water. After washing all the brushes, lay them in a neat row with bristles hanging on the edge of the counter to maintain its proper shape, and let them dry overnight. 

Throw away old make-up tools. Cleaning your make-up tools regularly will help extend their life. But there are signs you need to watch out for to know when it’s time to throw them away: brushes with bristles that are shredding, fraying or losing shape as they will no longer perform well. Regular sponges must be thrown away after one use whereas beauty sponges like Ever Bilena Blend Me Sponge can last up three to four months especially when cleaned regularly. 

Don’t let germs, bacteria or virus hang out in your make-up tools! Stay safe by cleaning your tools regularly. To know more about Ever Bilena and its products and makeup tips, visit Ever Bilena’s official Facebook page (@everbilenacosmetics) and Instagram (@everbillenofficial).

Facebook  Instagram  Twitter  Tumblr  Bloglovin  Fashiolista  Wattpad  Pinterest

Tuesday, March 5, 2019

Do You Really Get Cashbacks From Shopping With Shopback?


WHAT SHOPBACK IS ALL ABOUT

Shopback is a cashback reward program available across Asia-Pacific with over 5 million members on its platform. It allows online shoppers to take a portion of their cash back when they make a purchase through the platform. They also provide discount coupons, voucher codes, and even comparison features for online shopping, travel booking and food delivery. It is currently partnered with over 1,300 brands from all over the world, including online giants Amazon, Booking.com, eBay, ASOS, Zalora, Woolworths Online, Lazada, Uber, Grab, Shopee, Tokopedia, Blibli.com and Alibaba.

SO IS SHOPBACK LEGIT?

Indeed. I was hesitant to try Shopback at first knowing that scamming is very rampant nowadays. Exploring the application later on, I then realized that there's nothing to lose and nothing at stake anyway. Since I do online shopping more than dropping by at the actual stores, I think earning a little something from it is a smart move. I am sharing this blog to you, as we all know that technology is a widespread idea and a lot of people spend their time doing transactions online. If you are like me who places orders through websites, I guarantee that you will enjoy having Shopback installed too, in your phone.

The app isn't hard to utilize if that's what you think. It's free and convenient in a way that every time you shop at your favorite e-commerce sites, all you have to do is open their websites via Shopback and you will automatically get cash rebates once you successfully did a purchase. Now, please be advised that it would normally takes months before they release the cashback. I think this is to ensure that the purchase doesn't include any fraudulent activities and is completely successful (meaning no cancellations/return/refund).

HERE'S HOW SHOPBACK WORKS


First, you have to download the application from the App Store. You can sign in with your Facebook account or sign up with just your regular e-mail.

Every time you are planning to shop online, make sure to open the partner merchants through Shopback's platform to ensure getting rebates for every purchase made. You'll get notifications within 72 hours about the status of the rebates earned. You can check all available balance by clicking on the profile button on the upper right hand corner of the screen (see photo above). You will be redirected to the page that gives you information about the exact balance that is withdraw-able


You can click on the 'Check Cashback History' to display available balance, pending earnings,  withdrawn cash as well as the points earned from the purchase made. Available balance (are the approved transactions), pending earnings (are the unconfirmed rebates) and withdrawn (successfully transferred money to your bank account).

When using Shopback, you have to be patient because it takes months before partner merchants and Shopback confirmed that there weren't any cancellations made. Yes, if you cancelled/returned any order placed through the platform, cashbacks shall be considered null and void. Only successful transactions will be honored.


Shopback requires a minimum amount of P200 available balance before a withdrawal can be made. Yes, it would take several purchases to reach 200-peso threshold. Upon accumulating that much amount for the first time, Shopback will reward you an extra P100.


Now that we reached the required threshold, we are now ready to withdraw the available balance as real money! How?


You can opt for cashouts through Paypal or bank transfer. When opting for bank transfer, you have to add a bank account and verify it through e-mail. Shopback supports several banks like BDO, BPI, Metrobank, Chinabank, East West, Globe Gcash, PNB, RCBC, Security Bank, Union bank and UCPB.


You just have to navigate to your e-mail and click the link to verify the new cashout method. I encounter error verifying the bank account through my phone so if it happens to you, use your desktop instead. I guess this feature is only available for desktop use.


Proceed to withdrawing the money and you may have to enter an OTP code sent to your registered phone. This is an additional verification step. Lastly, you may also have to verify your e-mail address by checking your mail again.


You will then receive another e-mail confirming the cashout request.


And that's it! You will receive a notification e-mail once money was successfully transferred to your preferred cashout method. You can also simply monitor your bank account to make sure it gets credited! I received the money after exactly 7 days! Other times, it would just take a business day or two.

Using Shopback is really a smarter way of shopping online, don't you think? They run promotions too from time to time wherein you could earn more by completing tasks. During sale season, there's usually an increase in the percentage of cashback that you could get, so you may want to watch out for that too.

If you have further inquiries, you may just drop it on the comment section and I'll get back to you as soon as possible. Happy shopping!

Facebook  Instagram  Twitter  Tumblr  Bloglovin  Fashiolista  Wattpad  Pinterest

Wednesday, February 20, 2019

A Makeup Tutorial For The Love Month With Althea Korea's Color Makeups


I can’t believe Althea’s come up with several color makeups for the first quarter of the year and it’s my definition of perfect timing as it’s February which means love month! I know boyfriends think we’re still pretty—bare face or not—but for special days like this, we can always surprise them by going a little bit SPARKLY. Right, it’s past Valentines but allow me to share with you a makeup tutorial I did last February 14. I posted a picture of me with a bouquet and some of you asked what makeups I had on. You’ll know more about them if you keep on reading! ;)


So first thing is to keep your face clean and well-prepped. Do your usual skincare then proceed with the makeup base. On the picture below, I already set my face with a primer and foundation. The key to flawless finish is to properly blend with a trusted makeup tool.


I have slightly dark under eyes so Althea Korea Flawless Creamy Concealer will come very handy. Using the second to the lightest shade, Ginger, apply it in a triangular shape on your under eyes, forehead, bridge of the nose and chin area to highlight those parts and conceal peeking blemishes. I use the third shade, Honey, to cover some minor blemishes on other parts of the face. If you have lighter skin, Mocha will be an appropriate contour shade.


Do your brows and set your face with a translucent powder. I’ve used Althea Korea Petal Velvet Translucent Powder to control oil.


ALTHEA X BCL SUNRISE MOONRISE EYE PALETTE


Let’s proceed to the eyes which is the very part that will consume most of our time. You have the option to apply eye primer if you have excessively oily lids. I skipped this part and then proceed to warm up my lids using the #2 (matte beige) eye shadow in the Althea Korea X BCL Sunrise and Moonrise Eye Palette. Use a blending brush to diffuse the color.


This palette is very easy to work with even as an amateur as shadows are pretty blendable and very versatile.


Grab a bullet brush and swipe it to the shadow #6 (shimmery burgundy) and focus on your outer crease and blend inwards. Using another blending brush, you can use shadow #8 (shimmery plum) to deepen the crease.


With a shading brush, use shadow #7 (shimmery pink) to highlight the middle part of the lids. You can add some sparks and accentuate the eyes by adding a glittery touch using the shadow #3 (glittery pink) and highlight the brow bone with shadow #1 (shimmery white).


I like my eyes to be more sparkly so I use a little bit of the SpotlightEye Glitter in #2 Pink Light on the lower lash line and along tear ducts.


Finish your eyes with some waterproof eyeliner and mascara.


ALTHEA KOREA WATERCOLOR CREAM TINTS


In this tutorial, I use Althea Korea Watercolor Cream Tint in #3 Peach Cream as my blush. I blend it with a small duo fiber brush to diffuse the color and give it a subtle flush look. Don’t over apply because these are highly pigmented tints and a little goes a long way. You can add some highlighter on the highest parts of your face to finish the overall look.


Since I already made my eyes sparkly, I opted for a muted matte color for my lips. You can also use the least bold Watercolor Cream Tint (#3 Peach Cream) to color the pucker if you are after a more youthful vibe.


Here's the finish look! I enjoyed playing with the new Althea Korea Color Makeups and will surely mix and match to wear for the next occasion to come! I will be reviewing each products so make sure to stay tuned. Let me know if you recreate the look!

By the way, you can grab all these Althea exclusives by shopping through ph.althea.kr. Can't wait to hear your thoughts! :D

💕💕💕

Keep updated by following me on my social media accounts:

Facebook: https://www.facebook.com/theskincarefreak/
Instagram: https://www.instagram.com/hannapoleng/
Twitter: https://twitter.com/hannapoleng
Youtube: https://www.youtube.com/channel/UCeJZrWvwomBCAgC-JKhNe5A
Bloglovin: https://www.bloglovin.com/@hannapoleng
Fashiolista: http://www.fashiolista.com/#!/profile/hannapoleng/items

Monday, April 30, 2018

NBI Clearance Quick Online Renewal Option With Door-To-Door Delivery

Disclaimer: This is updated as of November 22, 2022. I am not in any way affiliated with NBI. Everything written here are solely based on my own experience.

NBI Clearance is considered as one of the valid certificates we could use here in the Philippines. It's one of the few valid I.D.s that are usually being asked when we do transactions, application for primary identification cards or even for verification purposes.

A lot of people are requesting for this on a daily basis for initial application and renewal, however, gone are the days when we have to fall in long queues just to have our documents printed. Fortunately, NBI launched a website that we can utilize to register an account with them with all our valid information. This is mainly to avoid the time-consuming filling out of personal information on the actual site. And imagine, with the use of just your laptop/smartphones and a stable connection, you can now register your information online hassle-free.

While there are a lot of step-by-step guides about NBI Clearance Application, I couldn't find any discussion or blogs about the convenience of renewing NBI Clearance online. I can tell because I had troubles figuring out if the NBI Clearance Online Renewal option (found on the upper righthand corner of the NBI website) is actually working or not. While I could patiently wait in long queues, it could save a great amount of time if I could renew my clearance without me having to repeat the steps all over again.


If you are someone who's about to have your first time getting an NBI Clearance, basically, you have to register online, follow normal sign up option, enter your information when prompted and select apply for clearance. You won't have any troubles as the website's interface is user-friendly.

Once you click the 'Ápply For Clearance' button, you'll be prompted as to which valid I.D. you will be presented to validate your information, schedule an appointment to an actual site and pay for the service fee (they offer different modes of payment). On the day of your scheduled appointment, you can only imagine how long the queue is and the dilemma won't end there. You will also have to take a photo, work on biometrics, sign up necessary documents and it will definitely cost you hours. It might even take longer if you don't register online.

In this blog though, we'll focus on NBI Clearance Online Renewal. Good news, all you need is your laptop and a stable internet connection. Ready your e-wallets or mobile banking apps if you want to do everything online.


How To Renew NBI Clearance The Easiest Way?

1. Go to NBI MAIN SITE. Look for NBI Clearance Online Renewal (on the upper righthand corner of the page). Note: There's no need to log in because you won't be able to see this option anymore. Please be advised too that this will only work for certificates issued October 16, 2016 and onwards.


2. A pop up box will appear after you clicked on it. It will prompt you to type in your NBI I.D. No. found in your old clearance. Yes, that's the long alpha-numeric characters. It's also case sensitive. Supply all other needed details such as your phone number, name and birthday. Click VERIFY.


3. You will have to choose an option to verify that this is truly your account. On the drop down button, you'll see 3 options. Choose whichever you want. In my case, I chose MOTHER'S INFORMATION. Supply the correct answer and hit VERIFY.


4. You will see the PAYMENT OPTION page with the price of the clearance and different modes of payment available. Please note that you will have to add an extra fee to use the e-payment service. You have the liberty to choose which payment method works best for you, you just have to click on it to get the reference number together with the additional steps.

In my case, I chose GCash. You will also get an SMS notification from NBI with the reference code. Paying through GCash app is also a breeze if this isn't your first time paying a biller on the app. Just make sure you typed in the correct reference number as failure to do so may cause delays or forfeiture of payment.


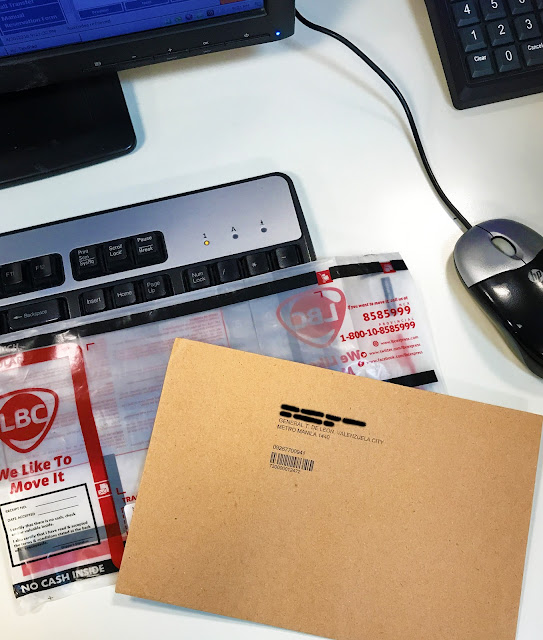
5. On the REFERENCE NUMBER page, there's two options on how you could get the clearance. You can come pick it up at the main office (no additional payment) or take advantage of their door-to-door delivery (be ready to pay the shipping fee). Click PROCEED.

DISCLAIMER NOTICE pop-up box will appear to which you'll just need to press AGREE.


6. You will be routed to their partner courier page which is dgi.deliverybox.ph so don't panic. Just click PROCEED after reading and then fill out your shipping details. For a more seamless and accurate delivery, you may even pin your preferred location.

Again, you'll just need to click PROCEED on the bottom part of the page and it will give you further instruction on the payment process. Please take note that you'll have to pay the clearance and shipping fee separately. Expect an e-mail from NBI too after successful payment and once your document has been processed and is ready for shipping. Just make sure to keep an eye on it.


That's basically everything! So easy to have your NBI Clearance renewed without you having to step outside your home. :D  Although you have to understand that it may take a while to be delivered. It took me less than a week to get my document though. If you are in a rush, this isn't the best option for you. 


Note: The NBI Clearance will only show all the information you entered when you initially created your account years back. The same information will display on your new clearance unless updated. If there's an information you would like to change, you will need to log in first and update your account. Although, I noticed that changing major information like address, must be done onsite.

That's pretty much everything you need to know! I never thought this was made possible. If you don't opt for the delivery and much preferred walking in (and saving for the additional fee on shipping), that's perfectly fine too. The process won't take as much time as during your initial application. Just go to the nearest NBI site and they would be willing to assist.

Facebook  Instagram  Twitter  Tumblr  Bloglovin  Fashiolista  Wattpad  Pinterest